Introduction
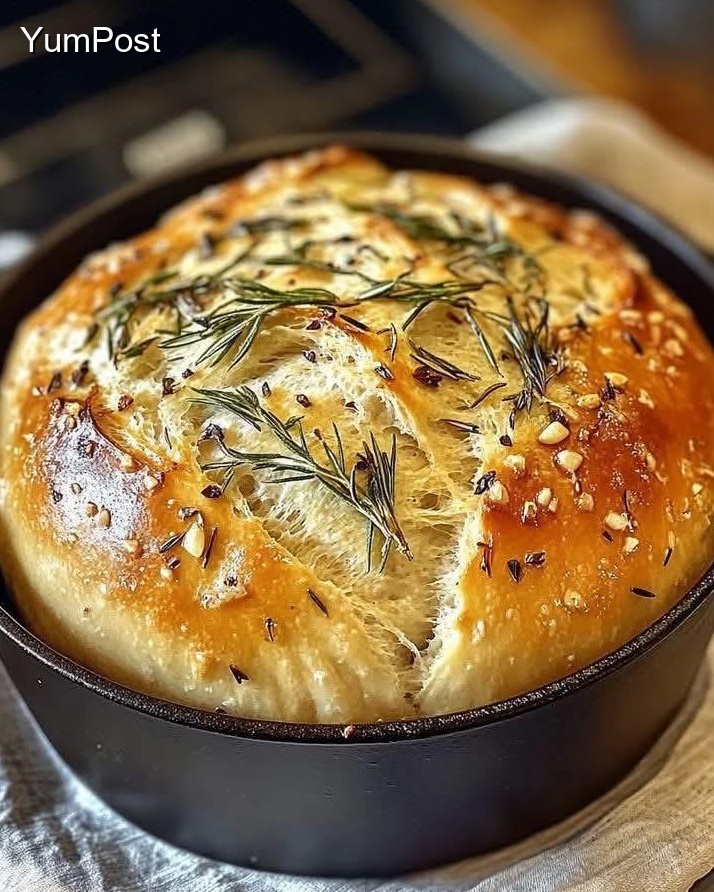
Looking for a delicious recipe that’s both easy and impressive? This No Knead Rosemary Garlic Bread is exactly what you need! With its perfect blend of flavors and simple preparation, this dish is ideal for weeknight dinners or special occasions.
Let’s get started on creating this tasty masterpiece!
Ah, moving from a vibrant, crunchy Tex-Mex dish to the comforting, aromatic world of homemade bread. Excellent transition. No-Knead Rosemary Garlic Bread is a perfect, almost foolproof loaf that fills your kitchen with the best smells imaginable. It’s a rustic, artisan-style bread with minimal effort.
The magic lies in time (a long, slow rise) and a very wet dough, which develops gluten without kneading. The addition of fresh rosemary and garlic makes it irresistible.
No-Knead Rosemary Garlic Bread
This recipe is an adaptation of the famous Jim Lahey method, perfected with savory flavors.
Ingredients
· 3 cups (360g) all-purpose flour or bread flour (bread flour gives a chewier crumb)
· 1 ½ tsp (6g) kosher salt
· ½ tsp (2g) instant or active dry yeast (that’s right, just a tiny amount!)
· 1 ½ cups (360ml) warm water (about 100°F/38°C)
· 2-3 Tbsp fresh rosemary, finely chopped (or 1 Tbsp dried)
· 3-4 cloves garlic, minced or pressed
· Optional: Extra virgin olive oil for coating, coarse sea salt for sprinkling.
Special Equipment:
· A medium/large mixing bowl
· A Dutch oven (or any heavy, oven-safe pot with a tight-fitting lid, like a cast-iron combo cooker)
Instructions:
Day 1: Mix & The Long Rest (12-18 hours)
- Combine Dry Ingredients: In a large bowl, whisk together the flour, salt, and yeast.
- Add Flavors & Water: Stir in the chopped rosemary and minced garlic. Add the warm water and mix with a wooden spoon or your hands until just combined. The dough will be shaggy, sticky, and messy—that’s perfect. Don’t over-mix.
- First Rise: Cover the bowl tightly with plastic wrap or a damp kitchen towel. Let it sit at room temperature (about 70°F/21°C) for 12 to 18 hours. The dough will become bubbly, doubled in size, and have a wet, gloppy texture.
Day 2: Shape, Final Rise & Bake
- Prepare: After 12-18 hours, place a large piece of parchment paper on your counter. Generously flour the paper and your hands.
- Shape: Without punching it down, use a bowl scraper or floured hands to gently scrape the dough out of the bowl onto the floured parchment. With floured hands, gently fold the edges of the dough into the center a few times to form a loose, rustic ball. Don’t knead it. The goal is to create surface tension.
- Second Rise: Use the parchment paper to lift the dough into a clean, lightly floured bowl (or just leave it on the counter). Cover again and let rest for 1-2 more hours, until puffy. Meanwhile, place your Dutch oven with its lid on into your regular oven and preheat to 450°F (230°C). This takes a full 30 minutes—the hot pot is the secret to a great crust.
- Bake: Once the oven is hot and the dough is puffy, carefully remove the Dutch oven. Lift the dough by the parchment paper and lower the whole thing (parchment and all) into the hot pot.
· Optional: Make a shallow slash (about ½ inch deep) on top with a sharp knife or razor blade. Drizzle lightly with olive oil and sprinkle with coarse salt and a little extra rosemary.
· Cover with the hot lid and place it back in the oven. - Bake Covered: Bake for 30 minutes with the lid on. This creates steam for a crispy, blistered crust.
- Bake Uncovered: Remove the lid (the bread will be pale and puffed). Continue baking for 15-20 more minutes, until the loaf is a deep, golden brown and sounds hollow when tapped.
- Cool: This is the hardest part. Transfer the bread to a wire rack and let it cool completely (at least 1 hour) before slicing. The inside is still cooking from residual heat.
Key Tips for Success:
· Timing is Flexible: The 12-18 hour rise is a window. If your kitchen is cooler, it may take longer. In a very warm spot, it might be ready sooner.
· Garlic Trick: For a mellower, sweeter garlic flavor without risking burnt bits, you can sauté the minced garlic in a little olive oil for 1 minute until fragrant before adding it to the dough. Let it cool slightly first.
· No Dutch Oven? Use any heavy, lidded, oven-safe pot. A pizza stone or inverted baking sheet can work for baking, but you’ll need to create steam: place a pan of boiling water on a lower oven rack.
· Fresh vs. Dried Herb: Fresh rosemary is superior here. If using dried, rub it between your palms to awaken the oils before adding.
· For a Softer Crust: Brush the top with melted butter right when it comes out of the oven.
Enjoy the process and the incredible result—a crackling crust, an airy, holey interior, and the warm aroma of rosemary and roasted garlic in every bite. It’s pure kitchen magic with very little work.
Conclusion
Congratulations on making this delicious No Knead Rosemary Garlic Bread! We hope you and your loved ones enjoyed every bite of this flavorful dish. This recipe is perfect for sharing with family and friends, and we’re confident it will become a regular favorite in your kitchen.
🍽️ Looking for more amazing recipes? Browse through our collection of delicious dishes on YumPost! From quick weeknight dinners to impressive desserts, we have something for every taste and occasion.
💬 Did you love this recipe? We’d love to hear from you! Share your experience in the comments below and let us know how it turned out. Your feedback helps us create even better recipes for you!
Share This Recipe
If you enjoyed this No Knead Rosemary Garlic Bread, please share it with your friends and family! Help us spread the joy of delicious homemade cooking by sharing this recipe on your favorite social media platforms. Your support means the world to us! ❤️
Don’t forget to explore more recipes on our website and discover your next culinary adventure!