Homemade Butterfinger Balls – Delicious & Homemade
Introduction
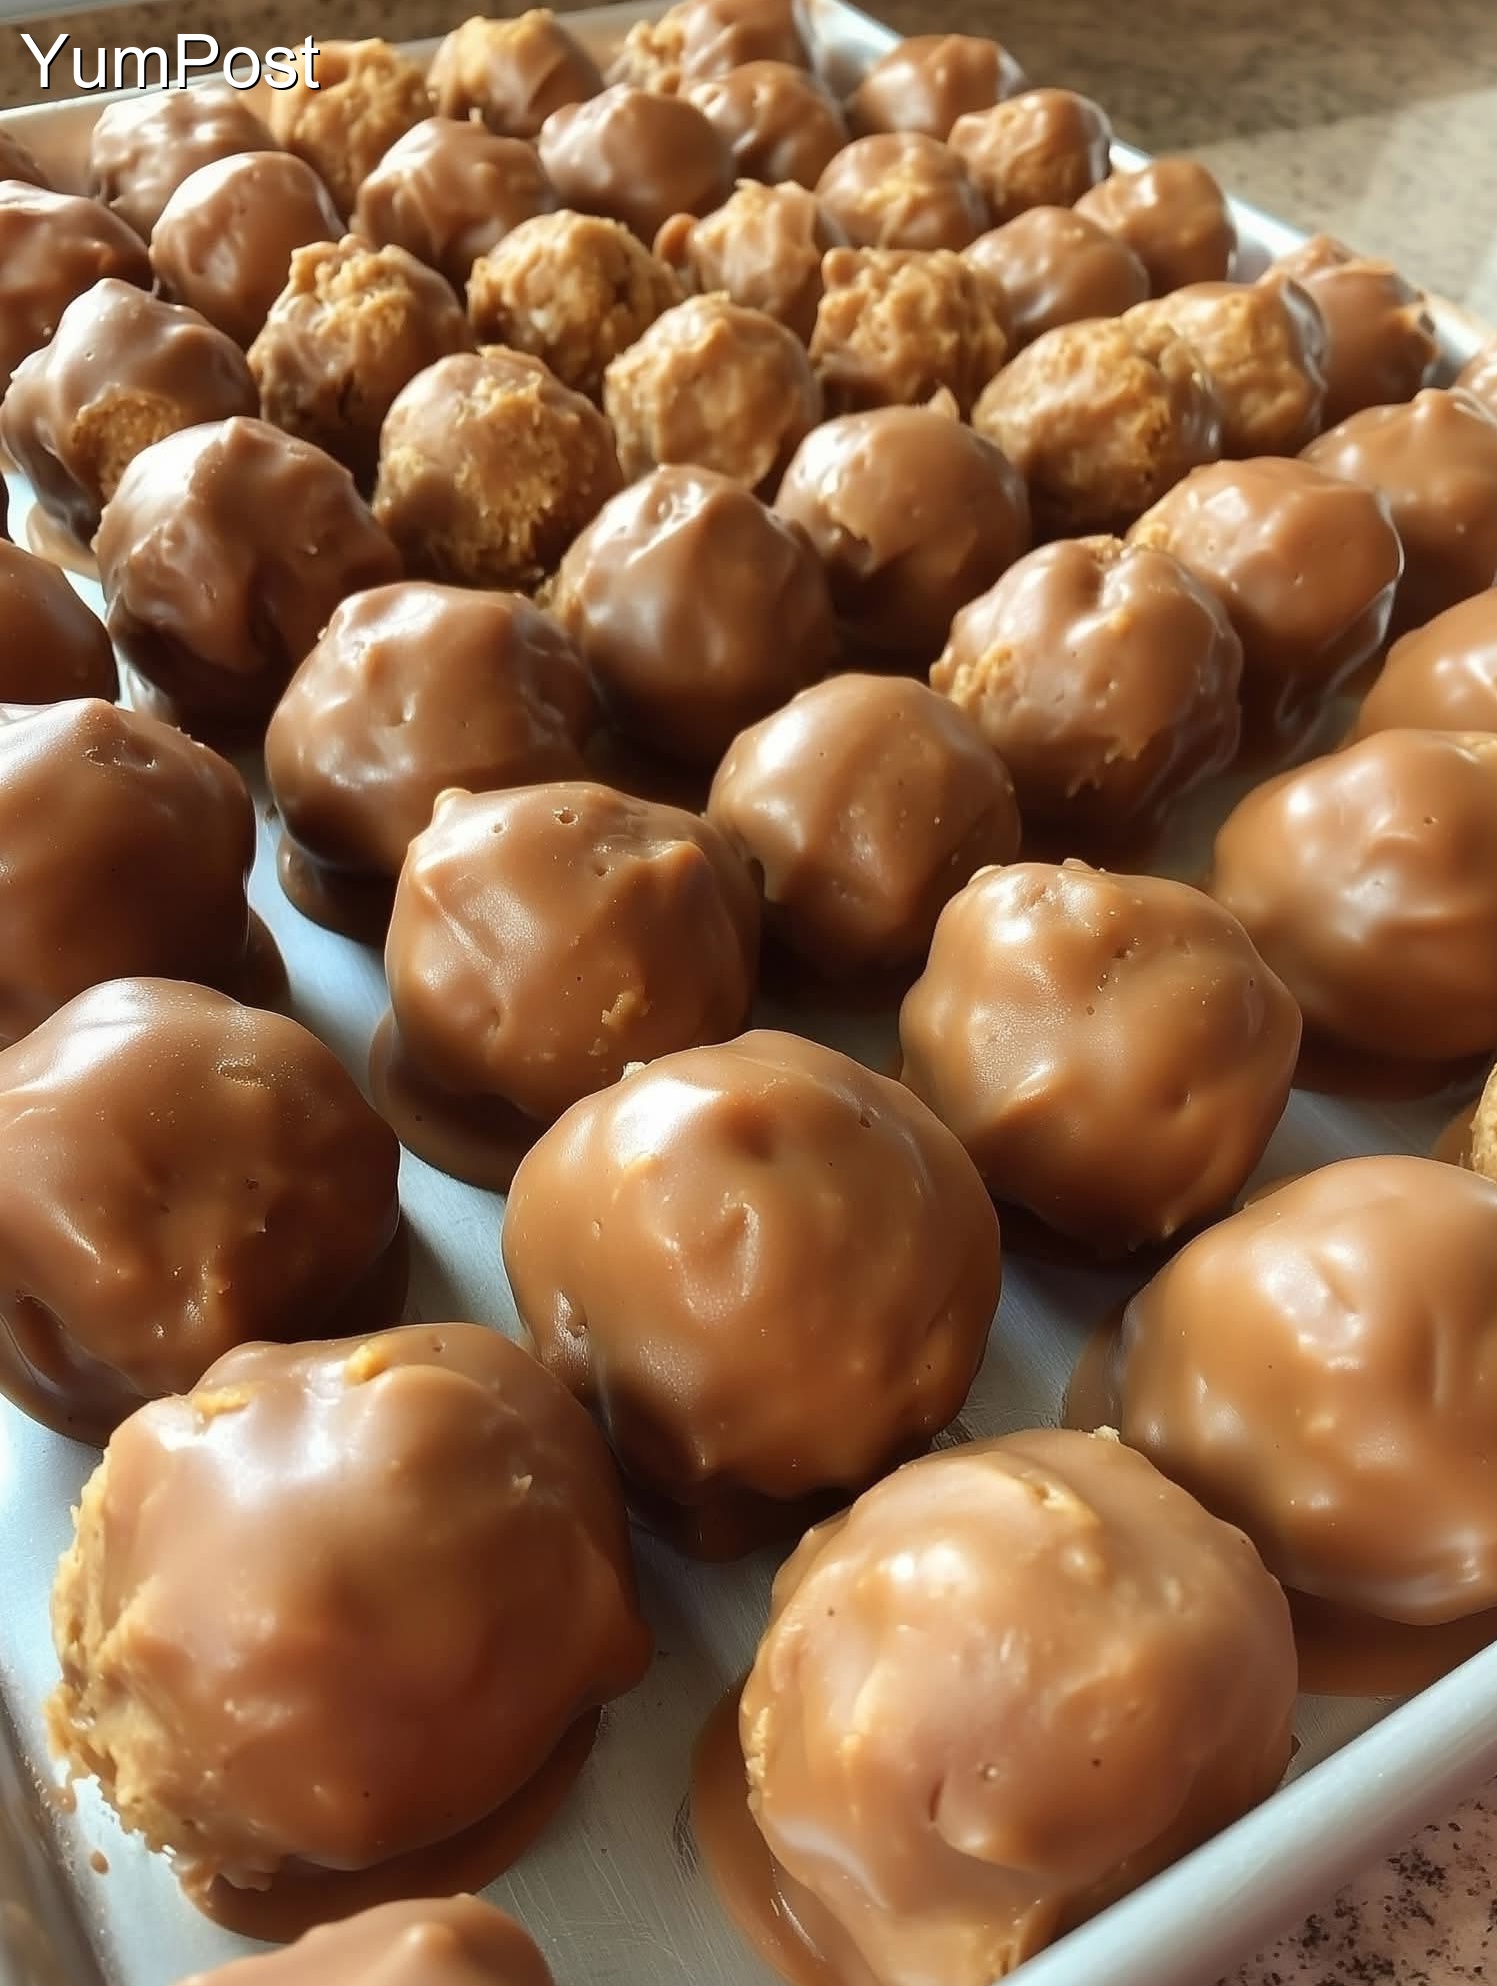
Get ready to make an incredible Homemade Butterfinger Balls that everyone will love! This recipe combines simple ingredients with great flavor to create something truly special. Perfect for any occasion, this dish is both delicious and easy to prepare.
Follow along as we show you how to make this wonderful recipe step by step!
Of course! Homemade Butterfinger Balls are a fantastic, no-bake treat that captures the iconic crispy, peanut-buttery, and chocolatey flavor of the classic candy bar. They’re surprisingly easy to make and incredibly addictive.
Here’s a foolproof recipe that uses simple ingredients.
Homemade Butterfinger Balls
This recipe uses a clever trick with candy corn to create that signature crispy, flaky texture.
Yields: About 24-30 balls
Prep time: 20 minutes
Chill time: 30 minutes
Cook time: 5 minutes (for melting)
Ingredients
For the “Butterfinger” Filling:
· 1 (16 oz) bag of candy corn (about 2 ½ cups)
· 1 (16 oz) jar of creamy peanut butter (about 1 ½ cups)*
· Pinch of salt (optional, if your peanut butter isn’t salted)
For the Coating
· 12 oz (about 2 cups) semi-sweet or dark chocolate chips
· 1 tbsp coconut oil or shortening (this makes the chocolate smoother and easier to coat)
Peanut Butter Note: For the best texture, use a standard, processed peanut butter like Jif or Skippy. Natural peanut butter (the kind that separates) can make the filling too oily and soft.
Instructions
- Line a Pan: Line a baking sheet with parchment paper or a silicone baking mat. Set aside.
- Melt the Base: In a large, microwave-safe bowl, combine the candy corn and the peanut butter. Microwave in 30-second bursts, stirring well after each interval, until the mixture is completely melted and smooth. This usually takes about 1.5 to 2 minutes total.
· Stovetop Method: You can also melt this mixture in a saucepan over low heat, stirring constantly. - Combine and Chill: Stir the mixture until it’s fully combined. It will be very thick and glossy. Let it cool for 5-10 minutes until you can handle it, then cover the bowl and refrigerate for at least 30-60 minutes, or until it’s firm enough to roll.
- Form the Balls: Once the mixture is firm, use a small cookie scoop or a teaspoon to portion it out. Roll it into smooth, 1-inch balls and place them on the prepared baking sheet. If the mixture becomes too soft and sticky to handle, pop it back in the fridge for 15 minutes.
· Pro Tip: For less mess, lightly grease your hands with butter or cooking spray. - Chill Again: Place the entire baking sheet of rolled balls in the freezer for at least 15-20 minutes. This is a crucial step! Frozen balls are much easier to dip in chocolate without falling apart.
- Melt the Chocolate: While the balls are chilling, combine the chocolate chips and coconut oil/shortening in a clean, microwave-safe bowl. Microwave in 20-second intervals, stirring thoroughly each time, until completely smooth and melted.
- Coat the Balls: Remove a few balls from the freezer at a time (keeping the rest cold). Using a fork or a dipping tool, dip each ball into the melted chocolate, tap off the excess, and place it back on the parchment paper.
- Set the Chocolate: Once all balls are coated, you can leave them as is or sprinkle with a little flaky sea salt for a gourmet touch. Let the chocolate set at room temperature (this can take an hour), or for a faster set, place them in the refrigerator for 15 minutes.
- Serve and Store: Once the chocolate is firm, they are ready to eat! Store them in an airtight container in the refrigerator for up to 2 weeks.
🌟 Pro Tips for Success
· Texture is Key: The chilling steps are non-negotiable. A firm, cold center is what allows you to roll and dip them neatly.
· Don’t Overheat Chocolate: Be patient when melting the chocolate. Overheating can cause it to “seize” (become clumpy). If this happens, stir in a tiny bit more coconut oil (a teaspoon at a time) to try to save it.
· For a Perfect Look: After dipping, if you want a classic “Butterfinger” look, you can use the tines of your fork to create wavy lines in the chocolate before it sets.
· Double-Boil for Shine: For the shiniest, most professional-looking chocolate coating, melt the chocolate and coconut oil using a double boiler instead of the microwave.
💡 Flavor Variations
· Different Chocolate: Use milk chocolate for a sweeter treat or white chocolate for a fun contrast.
· Add Crunch: Roll the finished, chocolate-dipped balls in crushed peanuts for an extra crunchy exterior.
· Spicy Kick: Add a tiny pinch of cayenne pepper to the peanut butter mixture for a surprising and delicious spicy-sweet flavor.
Enjoy your homemade candy-making adventure! These are guaranteed to be a hit with family and friends.
Conclusion
Congratulations on making this delicious Homemade Butterfinger Balls! We hope you and your loved ones enjoyed every bite of this flavorful dish. This recipe is perfect for sharing with family and friends, and we’re confident it will become a regular favorite in your kitchen.
🍽️ Looking for more amazing recipes? Browse through our collection of delicious dishes on YumPost! From quick weeknight dinners to impressive desserts, we have something for every taste and occasion.
💬 Did you love this recipe? We’d love to hear from you! Share your experience in the comments below and let us know how it turned out. Your feedback helps us create even better recipes for you!
Share This Recipe
If you enjoyed this Homemade Butterfinger Balls, please share it with your friends and family! Help us spread the joy of delicious homemade cooking by sharing this recipe on your favorite social media platforms. Your support means the world to us! ❤️
Don’t forget to explore more recipes on our website and discover your next culinary adventure!