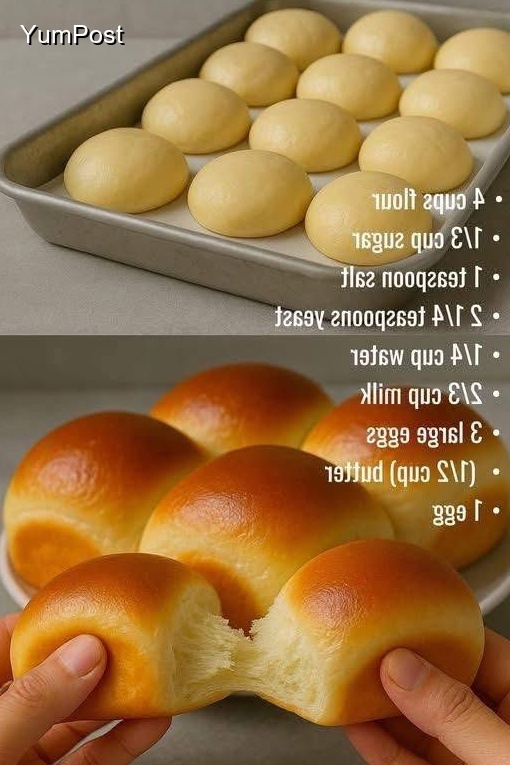
MILK BRIOCHE ROLLS – Delicious & Homemade
Introduction
Welcome to this delicious recipe for MILK BRIOCHE ROLLS! This dish is perfect for anyone looking to prepare a flavorful and satisfying meal. Whether you’re cooking for your family or hosting friends, this recipe is sure to impress with its wonderful taste and easy preparation.
Let’s dive into making this amazing dish that will become a favorite in your recipe collection!
Of course! Milk Brioche Rolls are the epitome of a luxurious, soft, and buttery bread. They have a rich, tender crumb and a beautifully golden, slightly crisp exterior. Making them from scratch is a rewarding process.
Here is a detailed, classic recipe for these heavenly rolls.
Classic Milk Brioche Rolls
This recipe uses a stand mixer, as the dough is very soft and sticky. The key to perfect brioche is patience and keeping the ingredients cool.
Prep Time: 30 minutes + 3-4 hours rising
Cook Time: 15-20 minutes
Yield: 12 rolls
Ingredients
· ½ cup (120ml) whole milk, lukewarm (about 110°F/43°C)
· 2 ¼ teaspoons (one ¼ oz packet) active dry yeast
· 2 ½ cups (315g) bread flour (all-purpose works, but bread flour is better)
· 2 tablespoons (25g) granulated sugar
· 1 teaspoon salt
· 3 large eggs, at room temperature, lightly beaten
· ½ cup (1 stick / 113g) unsalted butter, softened but still cool, cut into small pieces
· For the Egg Wash: 1 egg yolk + 1 tablespoon milk or cream, whisked together
Instructions
Step 1: Activate the Yeast
In the bowl of a stand mixer, combine the lukewarm milk and yeast. Let it sit for 5-10 minutes until it becomes foamy.
Step 2: Make the Dough
· Attach the dough hook to the mixer. Add the flour, sugar, salt, and beaten eggs to the yeast mixture.
· Mix on low speed for 2-3 minutes until a shaggy dough forms. Scrape down the sides as needed.
· Increase the speed to medium and knead for 5-7 minutes until the dough is smooth and begins to pull away from the sides of the bowl. It will still be very soft and sticky.
Step 3: Incorporate the Butter (This is Key!)
· With the mixer on medium-low, add the softened butter, one piece at a time, waiting for each piece to be almost fully incorporated before adding the next. This will take about 5-7 minutes. The dough will become very soft, smooth, and shiny. It will slap against the sides of the bowl—this is normal.
Step 4: First Rise
· Transfer the soft, sticky dough to a lightly greased bowl. Turn it over to coat it in oil. Cover the bowl tightly with plastic wrap.
· Let it rise in a warm, draft-free place for 1.5 to 2 hours, or until it has nearly doubled in size.
· Pro Tip: For a richer flavor and easier handling, you can do the first rise in the refrigerator for 6-12 hours (or overnight). The dough will rise slowly and develop flavor.
Step 5: Shape the Rolls
· Punch down the dough to deflate it. Turn it out onto a very lightly floured surface.
· Divide the dough into 12 equal pieces (a kitchen scale is helpful for this).
· To shape each roll, cup your hand over a piece of dough and roll it in a tight circular motion on the counter until it forms a smooth, tight ball.
· Place the shaped rolls into a greased 9×13 inch baking pan, spacing them evenly. You should have 3 rows of 4.
Step 6: Second Rise
· Cover the pan loosely with plastic wrap or a clean kitchen towel.
· Let the rolls rise again in a warm place for 1 to 1.5 hours, until they are puffy and have risen to touch each other.
Step 7: Bake to Golden Perfection
· Preheat your oven to 375°F (190°C).
· Just before baking, gently brush the tops of the rolls with the egg wash. Be careful not to deflate them.
· Bake for 15-20 minutes, or until the tops are a deep, glossy golden brown and the internal temperature registers 190°F (88°C).
· If the tops are browning too quickly, you can tent the pan with aluminum foil.
Step 8: Cool and Serve
· Remove the rolls from the oven and let them cool in the pan for 5 minutes.
· Then, transfer them to a wire rack to cool for at least 15-20 minutes before serving. The smell will be incredible, but tearing into them too early can make the crumb gummy.
Tips for Perfect Brioche Rolls
· Temperature is Crucial: Your ingredients should be cool to the touch, not warm. If the butter melts into the dough instead of being kneaded in, it will affect the texture.
· Don’t Add More Flour: The dough is supposed to be very soft and sticky. Adding extra flour will make the rolls dense. Trust the process and use a dough scraper to handle it.
· Patience with the Butter: Adding the butter slowly is the secret to a proper brioche structure. Rushing this step can cause the dough to separate.
· Use Bread Flour: Bread flour has a higher protein content, which creates a stronger gluten network to support all that rich butter, resulting in a better rise and texture.
· Make-Ahead: The shaped rolls can be covered and refrigerated after the second rise for up to 24 hours. Let them sit at room temperature for 30-60 minutes before baking. You can also freeze the baked and cooled rolls for up to 3 months.
Enjoy the process and the incredible, buttery results of your homemade Milk Brioche Rolls
Conclusion
Congratulations on making this delicious MILK BRIOCHE ROLLS! We hope you and your loved ones enjoyed every bite of this flavorful dish. This recipe is perfect for sharing with family and friends, and we’re confident it will become a regular favorite in your kitchen.
🍽️ Looking for more amazing recipes? Browse through our collection of delicious dishes on YumPost! From quick weeknight dinners to impressive desserts, we have something for every taste and occasion.
💬 Did you love this recipe? We’d love to hear from you! Share your experience in the comments below and let us know how it turned out. Your feedback helps us create even better recipes for you!
Share This Recipe
If you enjoyed this MILK BRIOCHE ROLLS, please share it with your friends and family! Help us spread the joy of delicious homemade cooking by sharing this recipe on your favorite social media platforms. Your support means the world to us! ❤️
Don’t forget to explore more recipes on our website and discover your next culinary adventure!