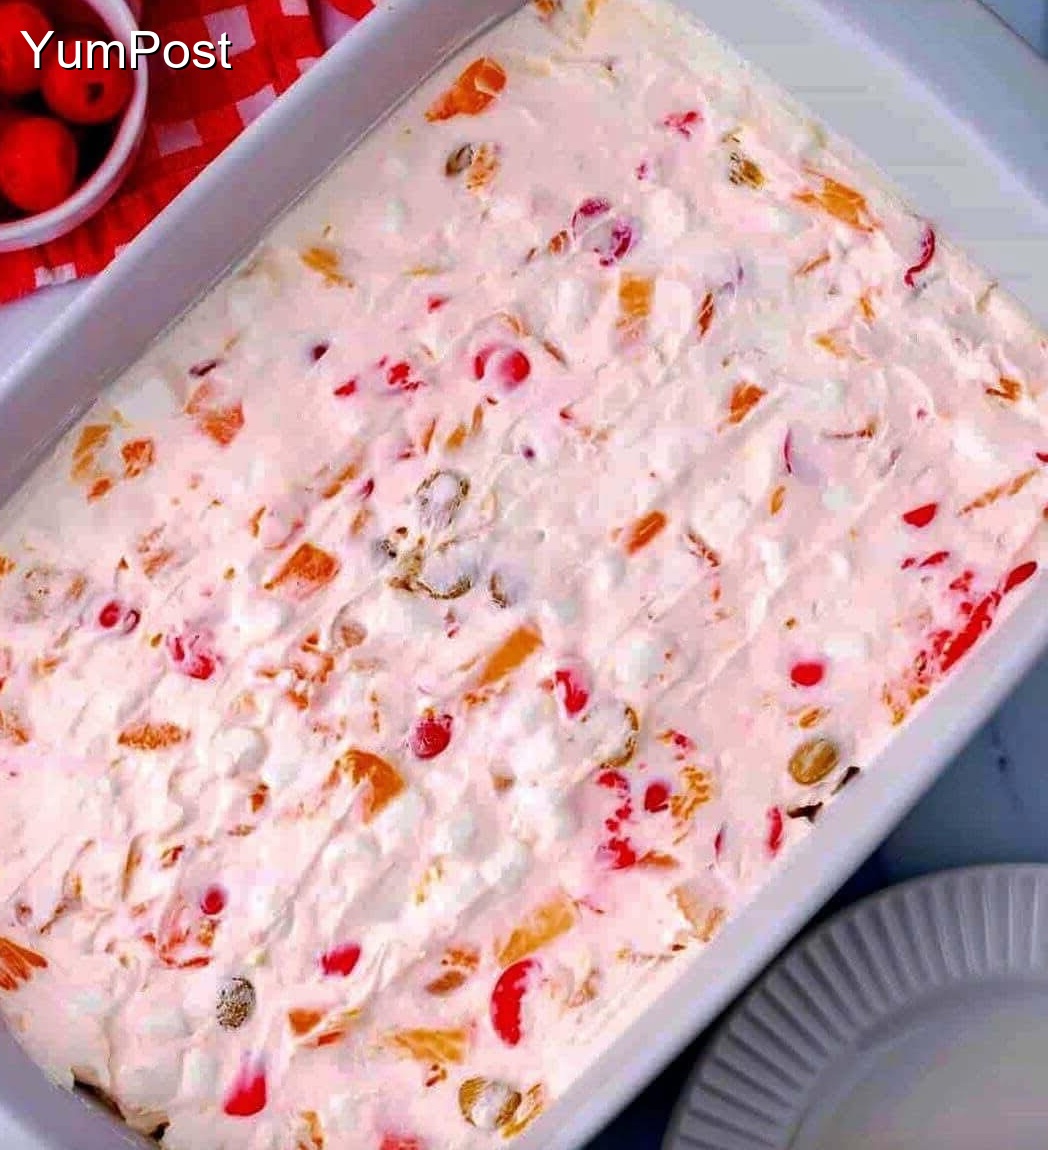
Frozen Fruit Salad – Fresh & Vibrant
Introduction
Get ready to make an incredible Frozen Fruit Salad that everyone will love! This recipe combines simple ingredients with great flavor to create something truly special. Perfect for any occasion, this dish is both delicious and easy to prepare.
Follow along as we show you how to make this wonderful recipe step by step!
Of course! Frozen Fruit Salad is a classic, retro dessert that’s incredibly easy to make and perfect for hot days, potlucks, or as a make-ahead treat. It’s not a salad in the green, leafy sense, but a delightful frozen concoction of fruit, creamy goodness, and often marshmallows or nuts.
Here’s a guide to making a classic version, along with variations and tips.
What is Frozen Fruit Salad?
Think of it as a cross between a fruit salad, a creamy fruit mousse, and ice cream. It’s typically made with a base of whipped cream or whipped topping, canned or fresh fruit, and other mix-ins, all frozen until firm and then sliced or scooped to serve.
Classic Pineapple & Cherry Frozen Fruit Salad
This is the quintessential version you might remember from church cookbooks or family gatherings. It’s sweet, creamy, and bursting with fruity flavor.
Prep Time: 15 minutes
Freeze Time: 6 hours or overnight
Servings: 12
Ingredients
· 1 (8 oz) package cream cheese, softened to room temperature
· 1 (14 oz) can sweetened condensed milk
· 1 (20 oz) can crushed pineapple, drained well
· 1 (10 oz) jar maraschino cherries, drained and quartered (reserve a few whole ones for garnish)
· ½ cup chopped pecans or walnuts (optional)
· 1 (8 oz) container frozen whipped topping (like Cool Whip), thawed – OR – 1 cup heavy cream, whipped to stiff peaks with 1 tbsp sugar
Instructions
- Cream the Base: In a large mixing bowl, beat the softened cream cheese with an electric mixer until it’s smooth and lump-free.
- Combine Wet Ingredients: Gradually beat in the sweetened condensed milk until the mixture is completely smooth and well-combined.
- Fold in Fruits and Nuts: Using a spatula, gently fold in the well-drained crushed pineapple, quartered cherries, and chopped nuts (if using).
- Add Whipped Topping: Gently fold in the thawed whipped topping (or your freshly whipped cream) until no white streaks remain. Be gentle to keep the mixture light and airy.
- Freeze: Pour the mixture into a 9×13 inch baking dish, a loaf pan, or a gelatin mold. Smooth the top with your spatula. Garnish with a few whole maraschino cherries if desired.
- Cover and Freeze: Cover the dish tightly with plastic wrap or aluminum foil. Freeze for at least 6 hours, or preferably overnight, until completely firm.
- Serve: Remove from the freezer about 10-15 minutes before serving to make it easier to slice. Cut into squares and serve.
Popular Variations & Ideas
The beauty of this recipe is its versatility. Here are some delicious twists:
· Tropical: Use drained mandarin oranges, crushed pineapple, and shredded coconut.
· Berry Blast: Substitute the cherries and pineapple with a mix of well-drained frozen berries (thawed and patted dry), like strawberries, blueberries, and raspberries.
· Ambrosia Style: Add 1 cup of mini marshmallows and ½ cup of shredded coconut along with the fruit.
· Strawberry Cheesecake: Use a 10 oz package of sweetened frozen strawberries (thawed and drained) instead of pineapple and cherries. You can even swirl in some strawberry jam.
· Lighter Version: Use reduced-fat cream cheese, light sweetened condensed milk, and light whipped topping.
Tips for the Perfect Frozen Fruit Salad
· DRAIN YOUR FRUIT! This is the most important step. Excess liquid from the fruit will form ice crystals and make the final product watery. Drain the fruit in a colander, and for even better results, press it gently with paper towels to remove as much moisture as possible.
· Room Temperature Cream Cheese: Ensure your cream cheese is fully softened. This will prevent lumps and make for a silky-smooth base.
· Don’t Skip the Fat: Using low-fat dairy can sometimes result in an icy texture. The fat in the cream cheese and whipped cream helps create a creamy, scoopable final product.
· Make-Ahead Marvel: This is a perfect do-ahead dessert. It can be made and kept frozen for up to 2 weeks.
· Serving Suggestion: For a pretty presentation, line your pan with plastic wrap before adding the mixture. Once frozen, you can lift the entire block out, invert it onto a serving platter, and slice it.
Enjoy this delightful, nostalgic treat! It’s a guaranteed crowd-pleaser.
Conclusion
Congratulations on making this delicious Frozen Fruit Salad! We hope you and your loved ones enjoyed every bite of this flavorful dish. This recipe is perfect for sharing with family and friends, and we’re confident it will become a regular favorite in your kitchen.
🍽️ Looking for more amazing recipes? Browse through our collection of delicious dishes on YumPost! From quick weeknight dinners to impressive desserts, we have something for every taste and occasion.
💬 Did you love this recipe? We’d love to hear from you! Share your experience in the comments below and let us know how it turned out. Your feedback helps us create even better recipes for you!
Share This Recipe
If you enjoyed this Frozen Fruit Salad, please share it with your friends and family! Help us spread the joy of delicious homemade cooking by sharing this recipe on your favorite social media platforms. Your support means the world to us! ❤️
Don’t forget to explore more recipes on our website and discover your next culinary adventure!